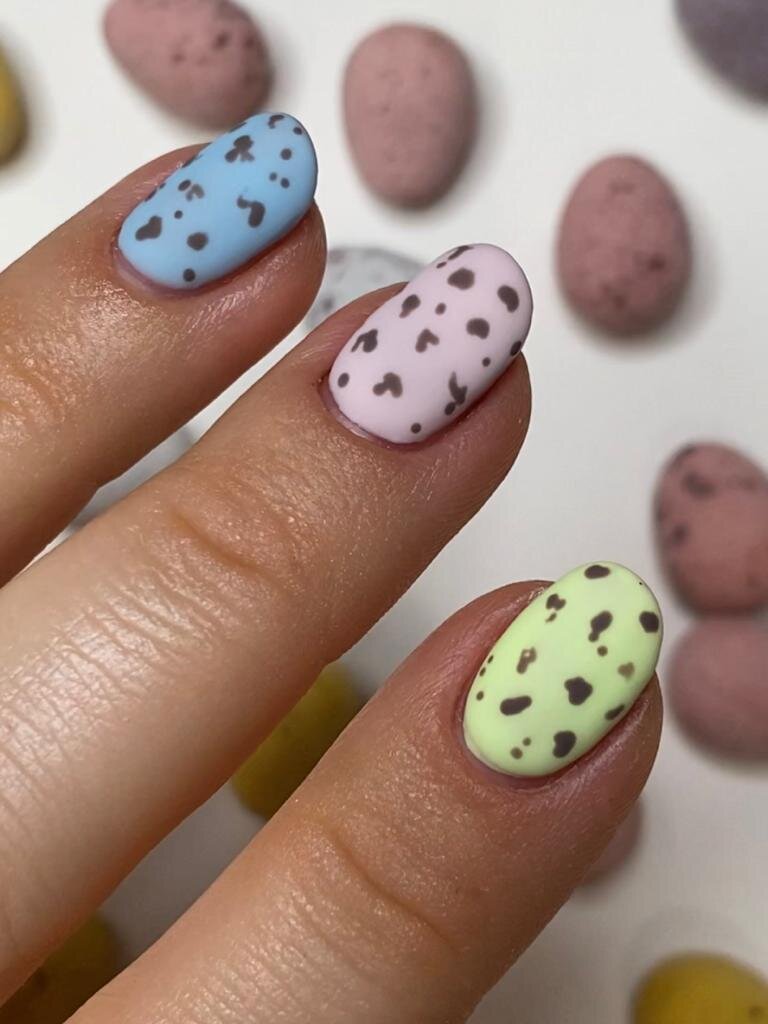
Mini Egg Nails For Easter - Step By Step Guide

Nail technician and Beauty Therapist, Aimee Purser Beauty provides her expert tips on how to create salon worthy nails Easter nails, inspired by our favourite Mini Eggs.
To get started you will need the following products....
A base coat
5 pastels for your background colours
A brown/grey colour for the speckles
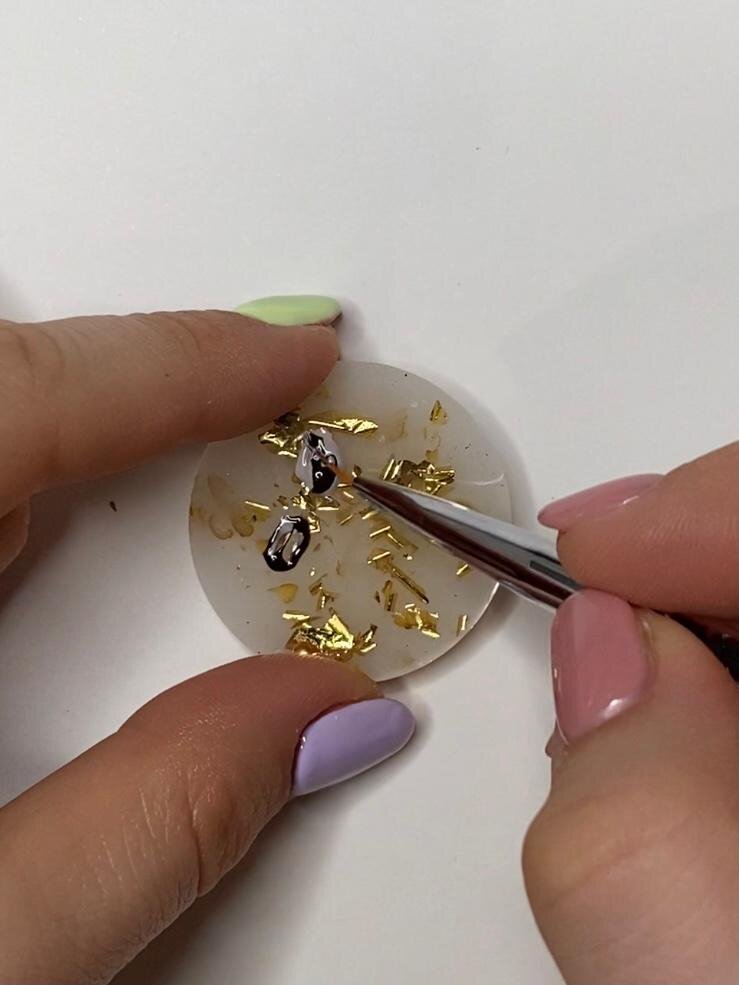
A nail pallet or small piece of foil
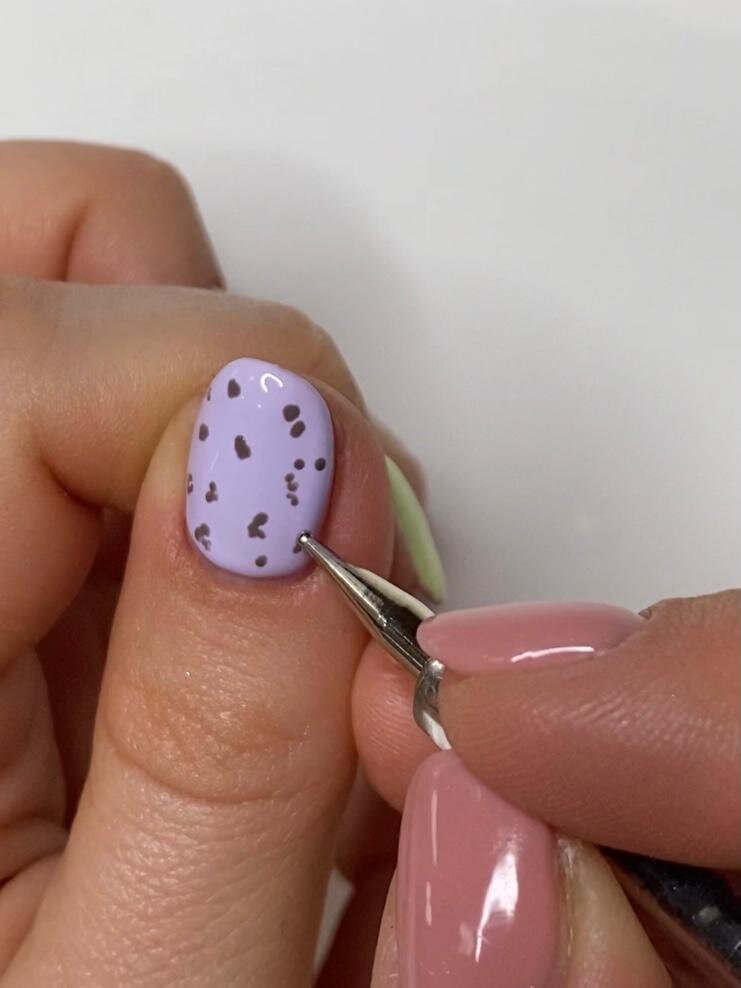
A small dotting tool or toothpick
A matte top coat
Get The Look - Step By Step

Follow pics left to right
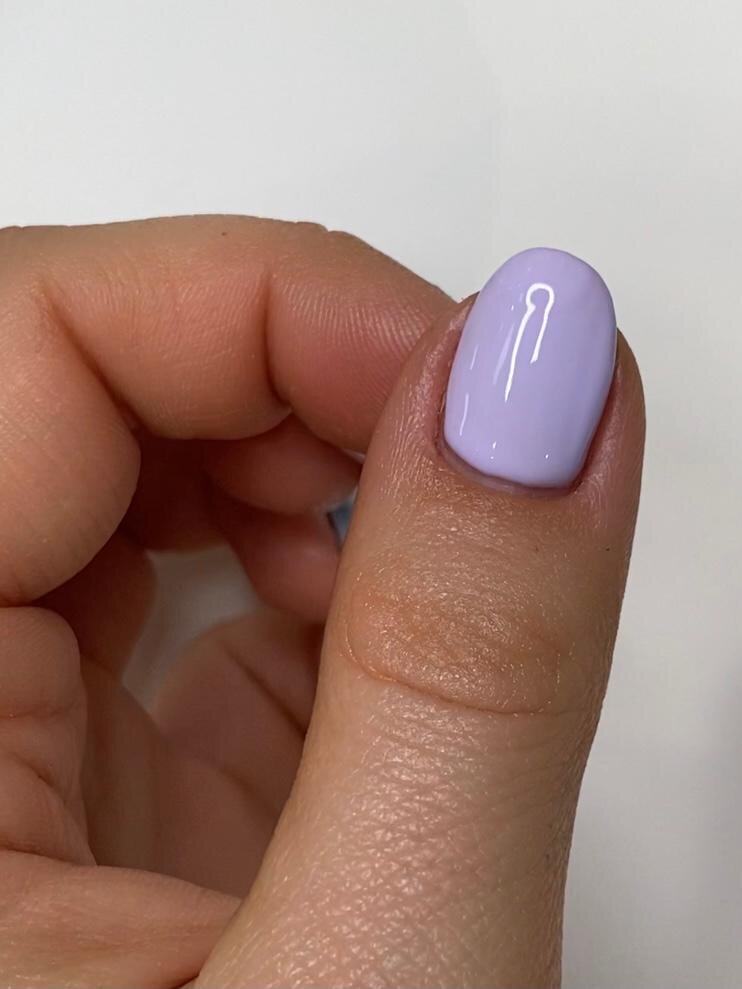
1. Start by prepping your nail, file and shape it to your liking, push back and trim the cuticles and apply a base coat. Cure or allow to dry.
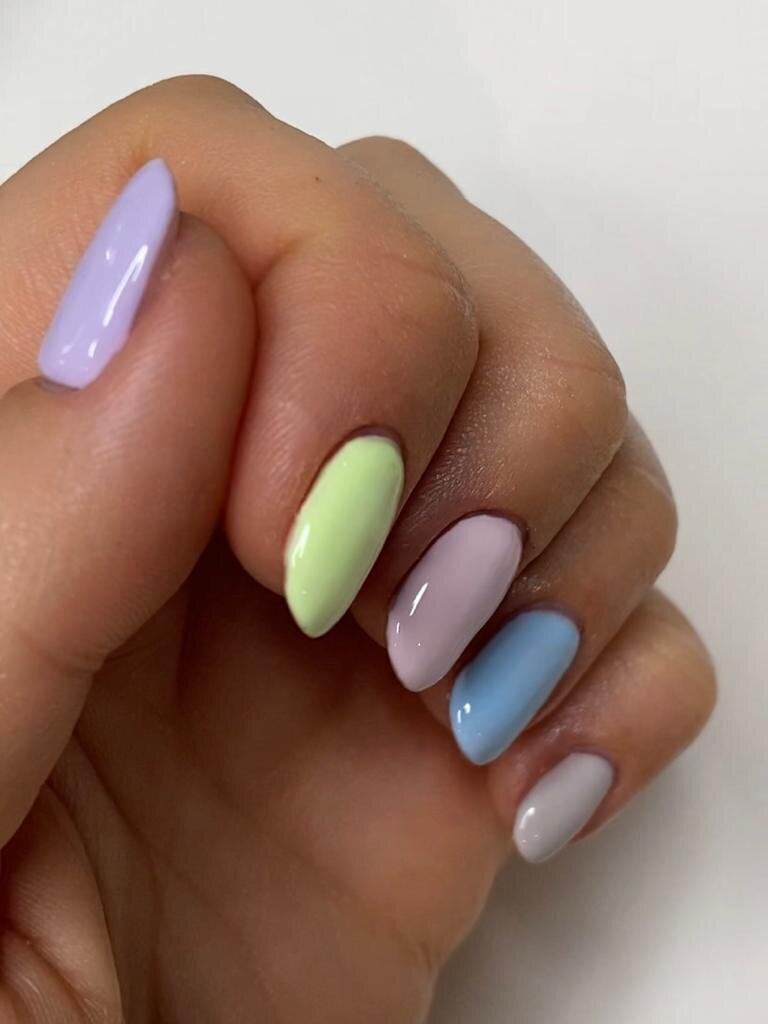
2. Once your base coat has cures/dried, apple the first later of your background colour. I have gone for. gradient of bright spring pastels to mimic the colours of mini eggs. Cure this layer or allow to dry.
3. Once your first coat of colour has cured/dried, apply a second coat. You want your background to be a solid colour. Cure/allow to dry. If you feel you need a more solid colour, you can repeat this step a third time.
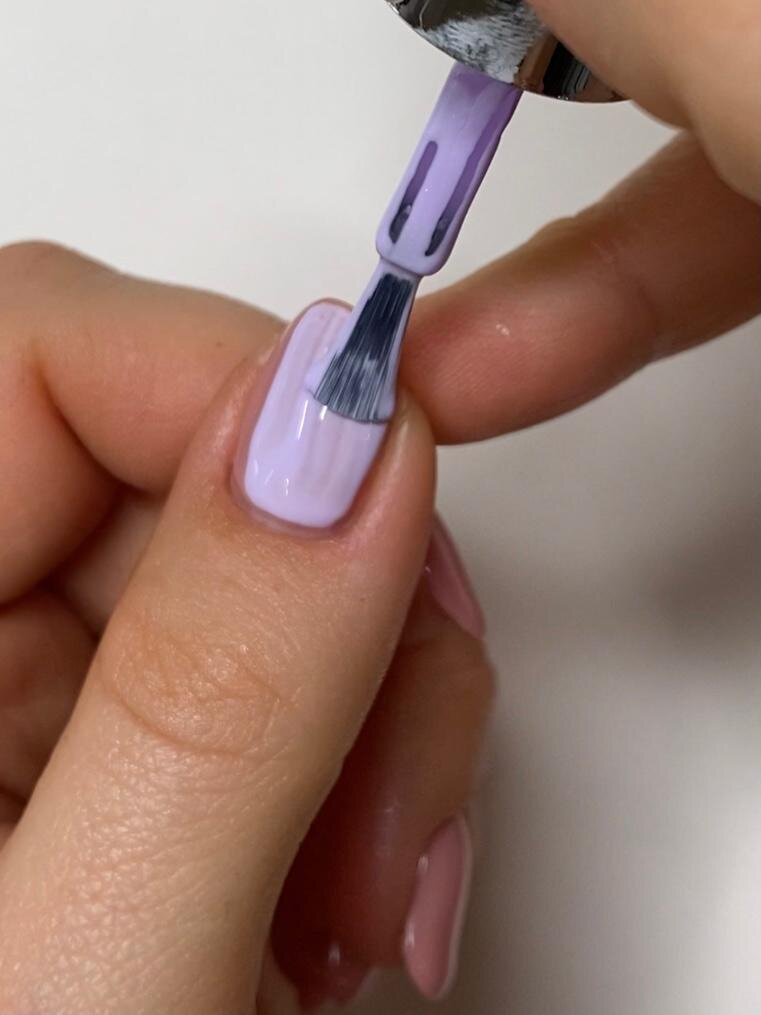
4. Put a little blob of brown and or grey polish on to a nail pallet or little piece of foil. I have used a brown and a taupe/grey and mixed the two.
5. Using a small dotting tool, apply little dots and smudge to the nails to give a speckled effect. If you do not have a dotting tool a toothpick will work just as well! Cure or dry your speckled layer.
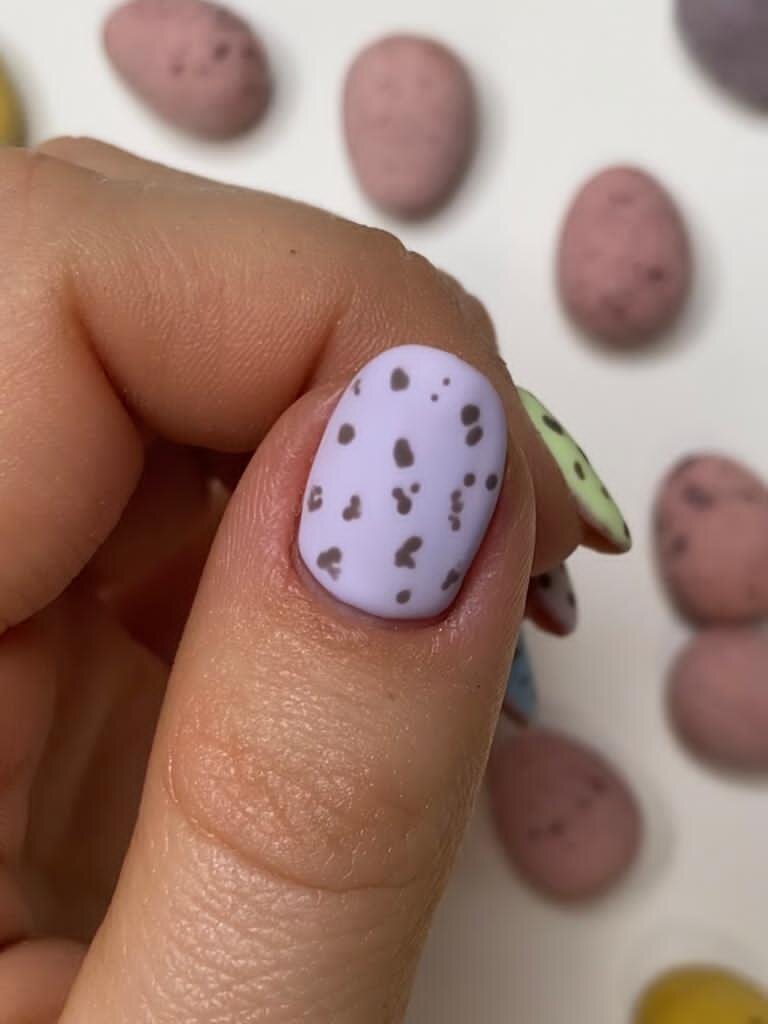
6. Apply a matte top coat to the nails and cure/dry.
7. Finish off with some cuticle oil and enjoy your mini egg inspired nails this Easter!